How to Incorporate 3D Rotation in Articulate Storyline
Articulate Storyline is a firm favourite here at 4pt. In fact, we’re always looking for ways to create engaging content that can be built using its features.
After experimenting with Fuse, the 3D modelling application from Adobe, we came up with an idea. We decided to create a 3D character and attempt to link it to Storyline’s native slider to create a 3D rotating interaction.

Development Workflow
Using Adobe Fuse to Create Our 3D Character
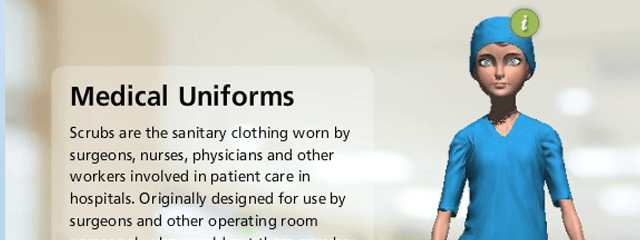
To begin with we created our character in Fuse. There are countless options available to customise your model, allowing you to control details such as the height and shape of your character. You can even choose from a range of facial hair options.

Uploading Our 3D Character to Mixamo
Once we were happy with our character, the next step was to upload her to Mixamo. Mixamo is Adobe’s web-based, auto-rigging software that takes the heavy lifting out of 3D character animation. Using Mixamo we were able to choose an animation, in this case a rotation. We applied the animation to our character, before downloading her in the Collada file format. Collada files can be identified by their .dae file extension. The great thing about this file format is that it opens up directly in to Adobe Photoshop, what’s more is that this made it really easy to add a background image by simply adding a new layer beneath our character in Photoshop.

The next part of the process was to get the character from Photoshop and in to Storyline. To do this we had to render our animation.

In the render settings we chose to export our animation as a Photoshop Image Sequence, using the PNG file format. This gave us 49 individual PNG images. Each image provided a different view of the rotation.
Using Storyline States to Complete the Rotation
Next we inserted the first image from our Photoshop Image Sequence in to Storyline. Then we edited the state of the image and added the remaining images from the sequence as a series of new states.

Now that the images we used to make up the rotation were in Storyline, we needed to link them to Storyline’s built-in slider.
To do this we created a series of triggers to update the variable associated to the slider. In essence, every time the slider moves up or down, the associated variable updates. In addition, when the variable updates the state of the image changes.

Summary
As impressive as rotating 3D objects are, all the bells and whistles are redundant if they can’t be used to enhance the eLearning experience. With this in mind we extended our demo further by adding interactive markers and a MCQ to provide an example of how to use 3D rotation as an appropriate solution in an eLearning setting.
On the whole the entire workflow was very simple and demonstrates just how far you can take your eLearning content with a little imagination.
UPDATE: 3D Rotation in Action
Since building this demo we’ve gone on to use Storyline and 3D rotation on a number of eLearning projects, our favourite enabled learners to explore the information on pet food packaging, learn more about this project here.
Useful Resources
Storyline 360: Adding and Editing States
Storyline 360: Working with Markers

View the 3D interaction
Click the button to view the demo. We’ve included built-in markers and custom MCQs to further demonstrate how to incorporate this sort of interaction in to an eLearning course.

Additional example
Click the button to view an additional example of 3D rotation in Articulate Storyline.
We used custom interactive markers to help show the most commonly affected sites for psoriasis to occur.
Related eLearning Insight Posts
AI Avatars You Can Talk To. And They Talk Back.
What if learners could speak to an avatar right inside Storyline? That’s what this demo explores.

eLearning Translation and Localisation
Drawing on our experience, this article explores eLearning localisation approaches, from XLIFF files and Word translations to AI tools, highlighting their benefits, challenges, and how to choose the best fit for your needs.
AI Avatars in eLearning
Read our first hand experience of using AI Avatars in eLearning courses, and find out what clients really think.

David began his eLearning career in 2000 after earning qualifications in Graphic Design and then Newspaper, Magazine and Infographic Design.
During his time working in the eLearning industry David has gained extensive experience designing and developing eLearning content for clients based in the UK, Canada and the USA. To date, David has created eLearning courses covering a broad spectrum of topics, ranging from Pharmaceutical, Healthcare, Retail and Sport through to Pet Nutrition, Marketing, Sales and Tourism.
He is passionate about creating well-designed and purposeful eLearning solutions. David is a current Articulate E-Learning Heroes Super Hero.


